Oracle Database 11g Release 2 (11.2.0.2) Installation On Solaris 10 (x86-64)
In this article I'll describe the installation of Oracle Database 11g Release 2 (11.2.0.2) on Solaris 10 (x86-64). The article is based on a default server installation as shown here. Alternative installations may require a different setup procedure.
Download Software
Download the following software.
Unpack Files
Unzip the files.
unzip p10098816_112020_Solaris86-64_1of6.zip
unzip p10098816_112020_Solaris86-64_2of6.zip
You should now have a single directory called "database" containing installation files.
Hosts File
The "/etc/hosts" file must contain a fully qualified name for the server.
<IP-address> <fully-qualified-machine-name> <machine-name>
For example.
127.0.0.1 localhost.localdomain localhost
192.168.0.135 s10-112.localdomain s10-112 loghost
Set Kernel Parameters
The Oracle 11gR2 installation requires Solaris 10 U6 or later. Check the version and update level using the following command.
# cat /etc/release
 Oracle Solaris 10 9/10 s10x_u9wos_14a X86
 Copyright (c) 2010, Oracle and/or its affiliates. All rights reserved.
 Assembled 11 August 2010
#
As the root user, issue the following command.
projadd oracle
Append the following line to the "/etc/user_attr" file.
oracle::::project=oracle
If you've performed a default installation, it is likely that the only kernel parameter you need to alter is "max-shm-memory" to meet the minimum installation requirements. To check the current value issue the following command.
# prctl -n project.max-shm-memory -i project oracle
project: 100: oracle
NAME PRIVILEGE VALUE FLAG ACTION RECIPIENT
project.max-shm-memory
 privileged 254MB - deny -
 system 16.0EB max deny -
#
To reset this value, make sure at least one session is logged in as the oracle user, then from the root user issue the following commands.
# prctl -n project.max-shm-memory -v 4gb -r -i project oracle
# projmod -s -K "project.max-shm-memory=(priv,4gb,deny)" oracle
The first dynamically resets the value, while the second makes changes to the "/etc/project" file so the value is persistent between reboots.
# cat /etc/project
system:0::::
user.root:1::::
noproject:2::::
default:3::::
group.staff:10::::
oracle:100::::project.max-shm-memory=(priv,4294967296,deny)
#
Add the following lines to the "/etc/inittab" file, immediately before the entry for "startd".
tm::sysinit:/usr/sbin/ndd -set /dev/tcp tcp_smallest_anon_port 9000 > /dev/console
tm::sysinit:/usr/sbin/ndd -set /dev/tcp tcp_largest_anon_port 65500 > /dev/console
tm::sysinit:/usr/sbin/ndd -set /dev/udp udp_smallest_anon_port 9000 > /dev/console
tm::sysinit:/usr/sbin/ndd -set /dev/udp udp_largest_anon_port 65500 > /dev/console
Append the following line to the "/etc/system" file.
set maxusers=16384
Reboot your system before attempting to install Oracle.
Setup
Check to see which of the required packages are already installed.
# pkginfo -i SUNWarc SUNWbtool SUNWhea SUNWlibC SUNWlibm SUNWlibms SUNWsprot \
 SUNWtoo SUNWi1of SUNWi1cs SUNWi15cs SUNWxwfnt SUNWcsl
system SUNWarc Lint Libraries (usr)
system SUNWbtool CCS tools bundled with SunOS
system SUNWcsl Core Solaris, (Shared Libs)
system SUNWhea SunOS Header Files
system SUNWi1of ISO-8859-1 (Latin-1) Optional Fonts
system SUNWlibC Sun Workshop Compilers Bundled libC
system SUNWlibm Math & Microtasking Library Headers & Lint Files (Usr)
system SUNWlibms Math & Microtasking Libraries (Usr)
system SUNWsprot Solaris Bundled tools
system SUNWtoo Programming Tools
system SUNWxwfnt X Window System platform required fonts
ERROR: information for "SUNWi1cs" was not found
ERROR: information for "SUNWi15cs" was not found
#
Add the "SUNWi1cs" and "SUNWi15cs" packages using the "pkgadd" command.
# pkgadd -d /cdrom/sol_10_910_x86/Solaris_10/Product SUNWi1cs SUNWi15cs

Processing package instance <SUNWi1cs> from </cdrom/sol_10_106_x86/Solaris_10/Product>

X11 ISO8859-1 Codeset Support(i386) 2.0,REV=2004.10.17.15.04
Copyright 2004 Sun Microsystems, Inc. All rights reserved.
Use is subject to license terms.

This appears to be an attempt to install the same architecture and
version of a package which is already installed. This installation
will attempt to overwrite this package.

Using </> as the package base directory.
## Processing package information.
## Processing system information.
 16 package pathnames are already properly installed.
## Verifying package dependencies.
## Verifying disk space requirements.
## Checking for conflicts with packages already installed.
## Checking for setuid/setgid programs.

This package contains scripts which will be executed with super-user
permission during the process of installing this package.

Do you want to continue with the installation of <SUNWi1cs> [y,n,?] y

Installing X11 ISO8859-1 Codeset Support as <SUNWi1cs>

## Installing part 1 of 1.

Installation of <SUNWi1cs> was successful.

Processing package instance <SUNWi15cs> from </cdrom/sol_10_106_x86/Solaris_10/Product>

X11 ISO8859-15 Codeset Support(i386) 2.0,REV=2004.10.17.15.04
Copyright 2004 Sun Microsystems, Inc. All rights reserved.
Use is subject to license terms.

This appears to be an attempt to install the same architecture and
version of a package which is already installed. This installation
will attempt to overwrite this package.

Using </> as the package base directory.
## Processing package information.
## Processing system information.
 21 package pathnames are already properly installed.
## Verifying package dependencies.
## Verifying disk space requirements.
## Checking for conflicts with packages already installed.
## Checking for setuid/setgid programs.

This package contains scripts which will be executed with super-user
permission during the process of installing this package.

Do you want to continue with the installation of <SUNWi15cs> [y,n,?] y

Installing X11 ISO8859-15 Codeset Support as <SUNWi15cs>

## Installing part 1 of 1.

Installation of <SUNWi15cs> was successful.
#
Create the new groups and users.
groupadd oinstall
groupadd dba
groupadd oper

useradd -g oinstall -G dba -d /export/home/oracle oracle
mkdir /export/home/oracle
chown oracle:oinstall /export/home/oracle
passwd -r files oracle
Create the directories in which the Oracle software will be installed.
mkdir -p /u01/app/oracle/product/11.2.0.2/db_1
chown -R oracle:oinstall /u01
If you have not partitioned your disks to allow a "/u01" mount point, you may want to install the software in the "/export/home/oracle" directory as follows.
mkdir -p /export/home/oracle/u01
ln -s /export/home/oracle/u01 /u01
mkdir -p /u01/app/oracle/product/11.2.0.2/db_1
chown -h oracle:oinstall /u01
chown -R oracle:oinstall /export/home/oracle/u01
Login as the oracle user and add the following lines at the end of the ".profile" file, making sure you have set the correct ORACLE_BASE value.
# Oracle Settings
TMP=/tmp; export TMP
TMPDIR=$TMP; export TMPDIR

# Select the appropriate ORACLE_BASE
ORACLE_HOSTNAME=s10-112.localdomain; export ORACLE_HOSTNAME
ORACLE_UNQNAME=DB11G; export ORACLE_UNQNAME
ORACLE_BASE=/u01/app/oracle; export ORACLE_BASE
ORACLE_HOME=$ORACLE_BASE/product/11.2.0.2/db_1; export ORACLE_HOME
ORACLE_SID=DB11G; export ORACLE_SID
PATH=$ORACLE_HOME/bin:$PATH; export PATH
Installation
Log into the oracle user. If you are using X emulation then set the DISPLAY environmental variable.
DISPLAY=<machine-name>:0.0; export DISPLAY
Start the Oracle Universal Installer (OUI) by issuing the following command in the database directory.
./runInstaller
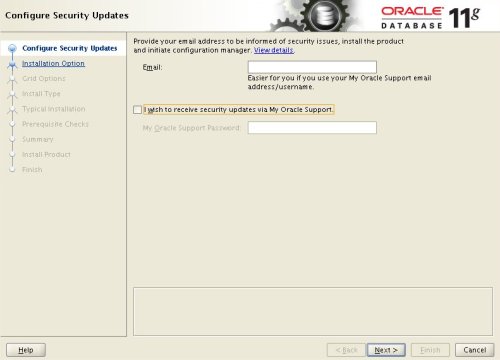
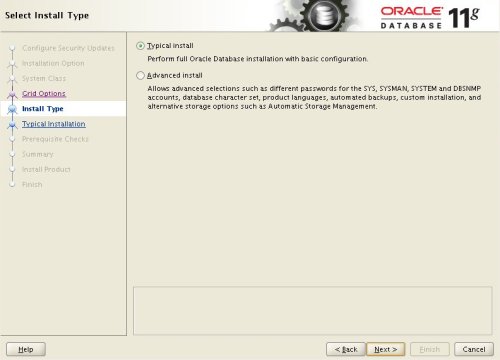
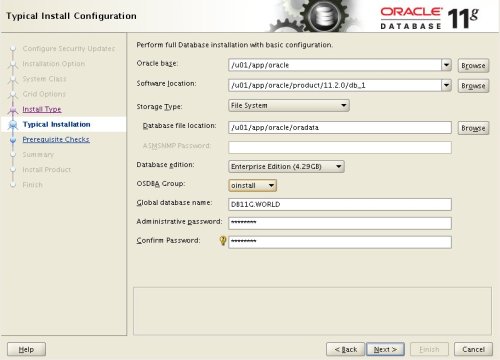
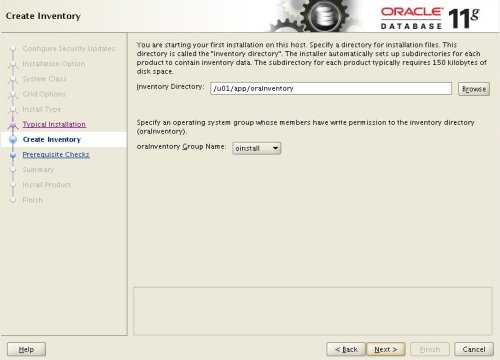
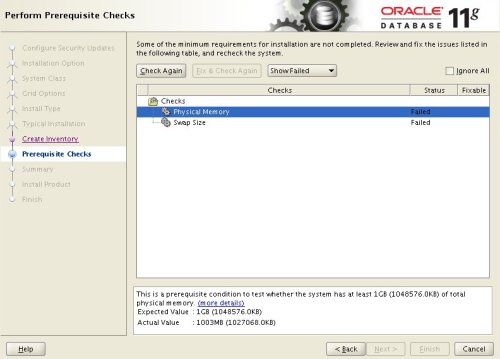
During the installation enter the appropriate ORACLE_HOME and name then continue installation. For a more detailed look at the installation process, click on the links below to see screen shots of each stage.
- Configure Security Updates
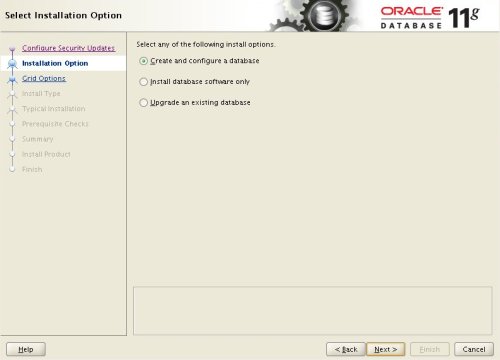
- Select Install Option
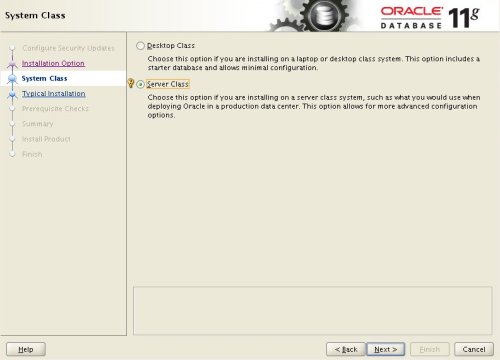
- System Class
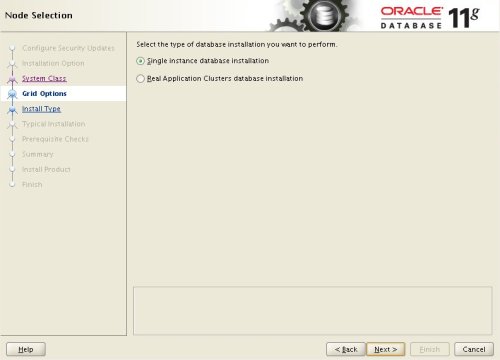
- Node Selection
- Select Install Type
- Typical Install Configuration
- Create Inventory
- Perform Prerequisite Checks
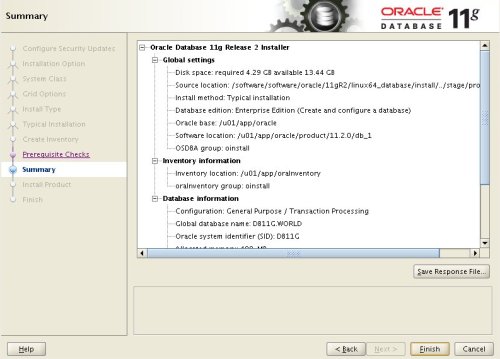
- Summary
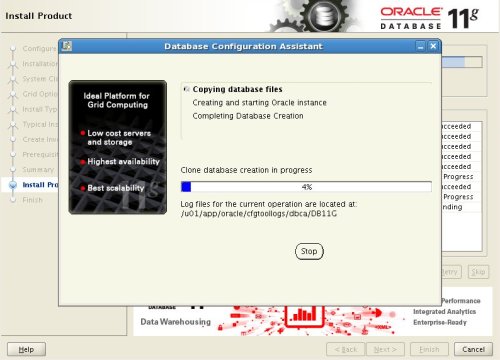
- Install Product
- li>Database Configuration Assistant
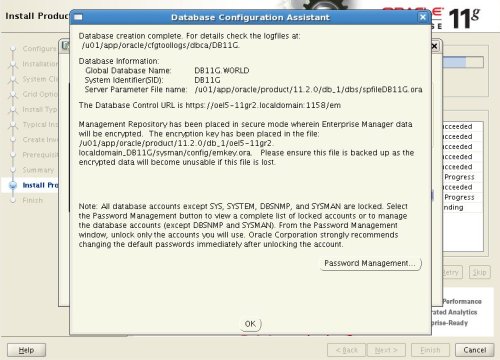
- Database Configuration Assistant 2
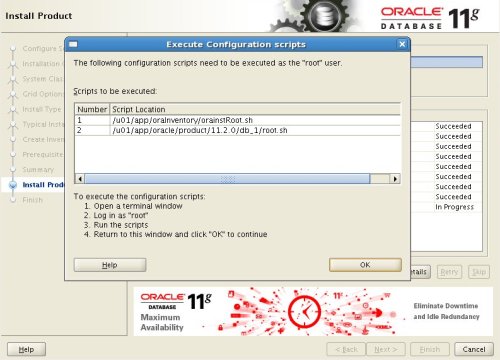
- Execute Configuration Scripts
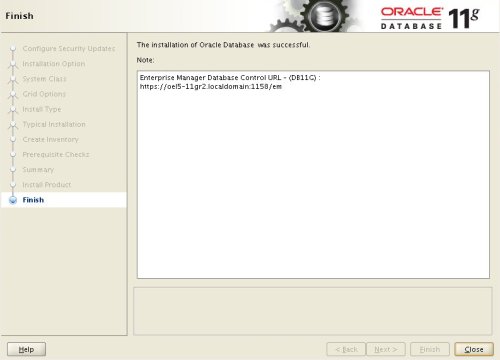
- Finish
Post Installation
Edit the "/var/opt/oracle/oratab" file setting the restart flag for each instance to 'Y'.
DB11G:/u01/app/oracle/product/11.2.0.2/db_1:Y
Create start/stop script:
$vi /etc/init.d/dbora.sh
write following content in it:
#!/sbin/sh
ORACLE_HOME=/opt/oracle/product/oracle
ORACLE_OWNER=oracle
if [ ! -f $ORACLE_HOME/bin/dbstart ]
then
echo "Oracle startup: cannot start"
exit
fi
case "$1" in
'start') # Start the Oracle databases and listeners
su - $ORACLE_OWNER -c "$ORACLE_HOME/bin/dbstart"
su - $ORACLE_OWNER -c "$ORACLE_HOME/bin/lsnrctl start"
;;
'stop') # Stop the Oracle databases and listeners
su - $ORACLE_OWNER -c "$ORACLE_HOME/bin/lsnrctl stop"
su - $ORACLE_OWNER -c "$ORACLE_HOME/bin/dbshut"
;;
esac
For Solaris:
Link the dbora.sh to /etc/rc directories:
ln -s /etc/init.d/dbora.sh /etc/rc0.d/K10dbora
ln -s /etc/init.d/dbora.sh /etc/rc2.d/S99dbora
or
cp /etc/init.d/dbora.sh /etc/rc0.d/K10dbora
cp /etc/init.d/dbora.sh /etc/rc2.d/S99dbora
For Linux:
$chkconfig --level 345 dbora.sh on
| 